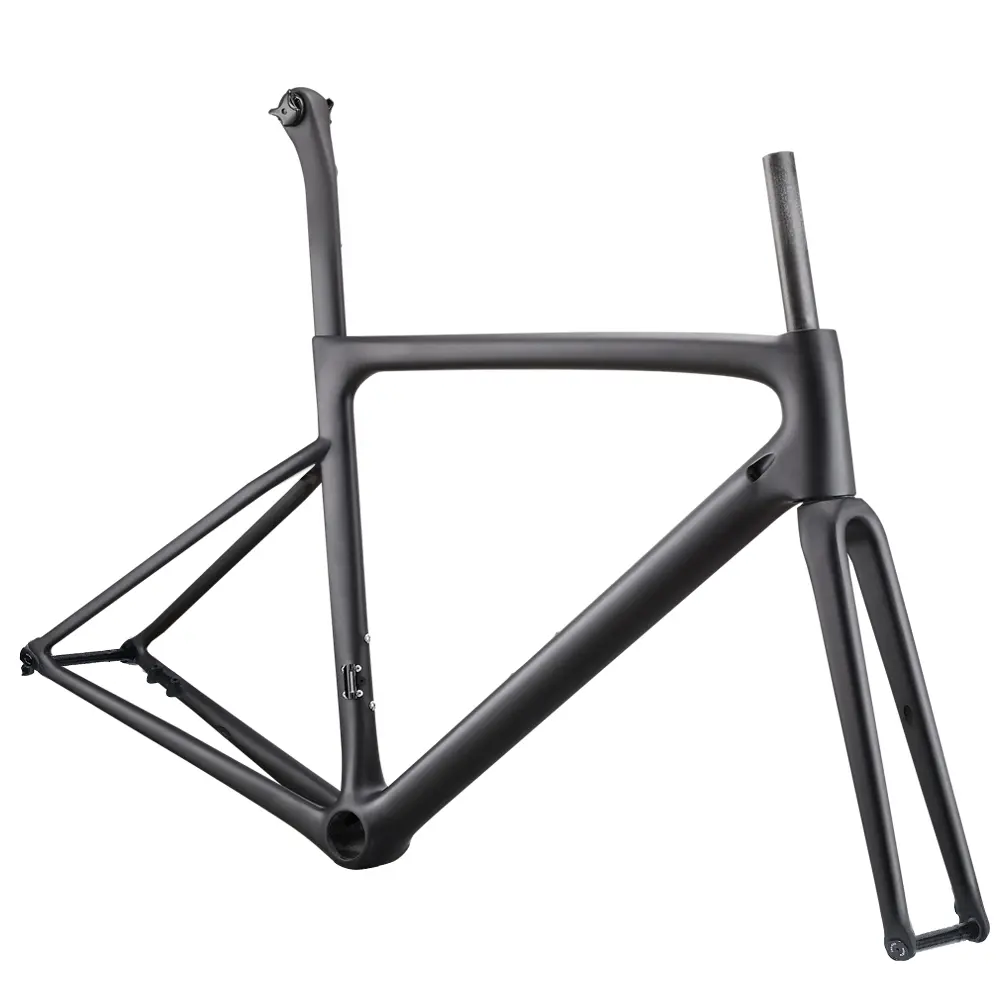
Custom bike development is not simply the act of drawing a distinctive frame and creating a mold. It is a controlled engineering process in which rider needs, performance targets, component standards, composite structures, manufacturing methods, testing, and quality systems must work together. A carbon bicycle becomes production-ready only when the design performs as intended and the factory can reproduce that performance consistently.
That distinction matters. A prototype can be light, attractive, and pleasant to ride while still being unsuitable for series production. It may depend on unusually careful handwork, contain difficult-to-inspect laminate details, conflict with a component supplier’s clearance envelope, or pass one test without having an adequate safety margin for manufacturing variation. Product development must expose and resolve those risks before volume production begins.
The journey moves through connected decisions: define the rider and use case; set measurable requirements; develop geometry and a size range; engineer the layup; validate the bicycle in 3D; test prototypes; freeze the design; finalize tooling; and prove the production process. Early decisions have disproportionate influence because tire clearance, frame architecture, mold construction, compaction, cost, and quality interact.
This guide explains the development journey for a custom carbon fiber bike. It applies to road, gravel, cyclocross, mountain, and time-trial bicycles, although loads, regulations, and validation plans differ by category.
Table of Contents
What Is Custom Bike Development?
Custom bike development is a structured bike manufacturing and development process that turns a product brief into a manufacturable bicycle. The word custom can mean adjusting an existing platform or creating new geometry, structure, tooling, and visual identity. In every case, engineering must control the relationship between intended use and the physical product.
A sound program begins with requirements rather than shapes. Engineers translate statements such as “fast endurance road bike” or “race-capable gravel platform” into quantities and decision criteria: rider mass range, terrain, wheel and tire sizes, target stiffness, allowable deflection, impact resistance, frame mass, aerodynamic priorities, service interfaces, test requirements, price architecture, and production volume. These requirements form the basis for design reviews and trade-offs.
The process is iterative. Geometry influences structure; structure influences manufacturing; and prototype results may require a new laminate or product decision. Stage gates keep that iteration controlled as the program moves through concept approval, design release, prototype validation, tooling, pilot production, and final approval.
Safety standards are one part of that evidence. The ISO 4210 family covers safety and performance requirements and test methods for common bicycle categories; for example, ISO 4210-2:2023 addresses requirements for city, trekking, young-adult, mountain, and racing bicycles, while Part 6 covers frame and fork test methods. Applicable legal requirements still depend on the product, use case, and destination market. Standards define a minimum validation baseline, not the entire engineering specification.
Why Brands Develop Custom Bikes?
Brands develop custom bicycles when an existing platform cannot adequately deliver the intended product. The reason should be explicit because it determines which features justify development risk.
Product differentiation is a common reason. In a crowded category, a proprietary silhouette alone has limited value if the bicycle rides like every alternative. Meaningful differentiation can come from handling, fit, suspension behavior, aerodynamic integration, tire capacity, low mass, durability, ease of service, or a deliberate balance among those qualities. The development brief must identify the difference that riders should actually perceive.
Market positioning provides another reason. Racing, all-road, and utility-focused bikes may use the same base material but need different geometry, laminates, interfaces, and tests. Product architecture must fit the price, rider, distribution, and service environment.
Performance improvement can also justify a new platform. An engineer may reduce aerodynamic drag, increase tire clearance without excessive chainstay length, tune pedaling stiffness, improve seated comfort, or expand the fit range. Such objectives must be measured against baselines. “Stiffer” is not automatically “better,” and a lighter frame is not automatically faster or more durable. The improvement needs context: stiffness at which interface, under which load; comfort at which frequency or deflection mode; weight saved at what effect on strength, repairability, or production yield?
Finally, geometry, tube forms, integration, graphics, and ride character can create a coherent brand identity. Identity is strongest when it grows from function—for example, when a distinctive down tube also manages airflow, laminate width, bottles, and local stability.
OEM, ODM and Fully Custom Development
OEM, ODM, and fully custom development describe different allocations of design responsibility and intellectual input. The labels are sometimes used inconsistently, so a project should define the actual scope rather than rely on the acronym alone.
In an OEM-style arrangement, a manufacturing partner produces a bicycle to specifications owned or substantially controlled by the customer. The customer may provide geometry, CAD, engineering requirements, graphics, and component configuration, while the manufacturer develops production details and executes tooling, layup, molding, finishing, and assembly. The critical issue is who approves design decisions and who owns the resulting data and tools.
In an ODM approach, the manufacturer offers an existing design or platform that a brand can configure. Customization may include paint, logos, component packages, selected fittings, or limited geometry and layup changes. Because the base product already exists, development can be faster and less expensive. The trade-off is less product uniqueness and less freedom to optimize every requirement.
Fully custom development begins with a new product brief and typically involves original geometry, exterior surfaces, structural analysis, laminate schedules, tooling, prototypes, and validation. It provides the greatest control but also introduces the highest engineering workload, tooling commitment, and schedule risk.
These approaches sit on a continuum: a program might combine a custom frame with an established fork or seatpost. The correct choice depends on which features create value and which risks the team can own. Responsibilities for CAD, analysis, testing, changes, tooling, compliance documentation, and quality approval must be clear before engineering begins.
Defining the Product Before Engineering Begins
Successful carbon bike development starts with a product definition that is specific enough to guide decisions but not so rigid that it dictates unverified solutions. Beginning CAD before agreeing on the use case often produces an attractive model surrounded by unresolved questions. Those questions become expensive when they surface after molds exist.
The core document is a product requirements specification identifying mandatory requirements, targets, assumptions, and exclusions. Requirements should be testable. “Fits 700 × 50 mm tires with stated rim and mud clearance” is more useful than “large tire clearance”; “no contact through the steering range with the specified routing” is more useful than “fully integrated cables.”
Requirements also need priorities. No frame can minimize weight, maximize every stiffness, provide high compliance, accept every component standard, remain inexpensive, and stay simple to manufacture. A ranked brief enables rational compromises.
Target Rider and Application
The target rider is an engineering input, not only a marketing persona. Development teams need to define rider mass, power, experience, fit distribution, riding style, terrain, speed, luggage, and expected misuse. A 60 kg elite climber and a 110 kg recreational rider can fit the same nominal frame size while imposing different loads and wanting different ride characteristics. The product may need one universal structural specification or size- and use-specific laminate schedules.
Application defines the load environment. A road race bike experiences repeated pedaling, sprinting, cornering, braking, and surface impacts. A gravel bike adds larger tire envelopes, debris, vibration, and potentially luggage mounts. A mountain bike introduces suspension forces, jumps, rock strikes, and more severe local impacts. A time-trial bike prioritizes aerodynamics and rider position but must still satisfy steering, braking, and service requirements. These are not styling variations; they create different engineering boundary conditions.
The product category should include explicit boundaries. Is the bike approved for racing, commuting, indoor trainers, fenders, racks, child seats, or bikepacking loads? What maximum system mass includes the rider, bicycle, and cargo? Which wheel sizes and suspension travels are allowed? Which uses are prohibited? Clear boundaries support structural analysis, test planning, manuals, and warranty assessment.
Fit data should be considered at the range level. The team can use anthropometric data, bike-fit records, competitor measurements, and target riding positions to define stack, reach, seat-tube angles, standover, and contact-point adjustment. An authority product does not simply scale one sample frame. It considers whether short and tall riders can achieve the intended position without extreme stems, spacers, seatpost offsets, or compromised handling.
Finally, intended markets influence development. Safety standards, labeling, competition rules, climate, common component availability, and service expectations differ. If a frame is intended for sanctioned competition, current equipment rules must be reviewed during concept work. The UCI equipment resources include technical regulations and approval information; these requirements can change, so they should be treated as controlled project inputs rather than recalled from an old design.
Performance Objectives
Performance objectives connect frame engineering with ride performance through measurable targets. The central challenge is balance. Carbon fiber offers freedom to place and orient material, but not freedom from trade-offs.
Weight is usually expressed as a target mass for a defined frame size, finish condition, hardware configuration, and tolerance. A bare unpainted sample is not comparable with a production frame containing inserts, hardware, protective films, filler, paint, and clear coat. The mass target should include an acceptable range and should be connected to structural margin and manufacturing capability.
Stiffness must be defined by load case. Bottom-bracket lateral stiffness, torsional stiffness, head-tube response, rear-triangle lateral behavior, and local interface stiffness describe different properties. Increasing one can add mass or transmit more vibration without improving the rider’s outcome. Engineers establish repeatable fixtures and measure force-displacement behavior so that prototypes can be compared with targets and reference bicycles.
Comfort is also multidimensional. Frame deflection contributes to the system, but tires, pressure, wheels, saddle, seatpost, handlebar, rider position, and exposed seatpost length can dominate perceived compliance. The frame should therefore be tuned as part of the complete bicycle. Controlled vertical or fore-aft compliance may be desirable; uncontrolled torsion, brake rub, or steering delay is not.
Aerodynamics require a system view. Tube sections interact with the rider, bottles, wheels, fork, cockpit, cables, and yaw angle. An aerodynamically narrow shape may constrain laminate placement or reduce local stability. Wide tire clearance can disturb airflow at the fork crown and stays. Wind-tunnel or validated computational work should use the intended configuration, not an unrealistic bare frame.
Durability includes fatigue, impact, environmental exposure, insert integrity, bearing-seat stability, and assembly loads. Cost includes layup labor, mold complexity, consumables, cure time, machining, finishing, inspection, scrap, and rework. A clear hierarchy can make safety and component function mandatory, prioritize handling, optimize mass and aerodynamics within those constraints, and accept cosmetic complexity only when production remains stable.
Component Compatibility
Component compatibility must be engineered before the frame surfaces are frozen. Modern bicycles are systems of tightly packaged parts, and nominal standards do not guarantee that every component combination will fit.
The drivetrain definition includes crank and chainring envelopes, chainline, bottom-bracket interface, front derailleur or guide, cassette, rear derailleur, hanger system, chain growth on suspended bikes, and electronic or mechanical routing. The frame must provide static and dynamic clearance under realistic tolerances. SRAM, for example, states that UDH and Transmission products require a frame designed around the relevant interface and clearance specifications; a UDH part cannot simply be added to an arbitrary dropout. Current supplier frame-fit files should be imported or referenced directly rather than approximated from a physical component.
Wheel compatibility includes diameter, hub spacing, axle diameter and thread, rotor size, cassette location, rim width, dish, and wheel-removal access. Tire clearance is defined using the measured tire on a stated rim, not only the size printed on the sidewall. Engineers add allowance for manufacturing tolerance, wheel flex, tire variation, debris, protective film, and—in off-road categories—mud. Front clearance must be checked through steering and fork deflection; rear clearance must cover chainstays, seatstays, seat tube, front derailleur area, and chainring.
The cockpit definition covers steerer dimensions, headset bearings, compression hardware, stem, handlebar, spacers, computer mounts, and hose or wire paths. Internal routing can improve appearance and sometimes aerodynamics, but it can also increase assembly time, minimum bend radii, noise, and service difficulty. CAD must represent the cables or hoses as routed volumes, not as zero-thickness lines.
Other decisions include seatpost insertion, clamp access, brake and accessory mounts, battery placement, and torque limits. Each interface needs a datum, tolerance, material strategy, and inspection method. Galvanic interaction, bond design, drainage, and corrosion protection must also be addressed. A compatibility matrix records approved configurations and exclusions.
Engineering the Bicycle Frame
Once the product is defined, engineering converts requirements into geometry, structure, and manufacturing data. These activities overlap. Geometry establishes load paths and packaging; carbon layup determines how the structure carries those loads; 3D CAD connects the design to parts, tools, assembly, and inspection.
A controlled digital definition keeps geometry, surfaces, laminate drawings, inserts, materials, tolerances, and test revisions aligned. Otherwise, a successful prototype may not match the design later sent to production.
Geometry Development
Bicycle geometry serves three functions at once: it fits the rider, controls handling, and packages the bicycle. Good geometry begins at the contact points and works outward.
Fit is commonly described with frame stack and reach, but those values are only the start. Engineers consider saddle height and setback ranges, handlebar reach and drop, crank length, stem options, spacer limits, hood position, toe overlap, and standover. Seat-tube angle must be evaluated at realistic saddle heights, especially when the seat tube is curved or offset. A nominal angle alone may hide a large change in effective position across sizes.
Handling results from the combined system. Head angle, fork offset, wheel radius, trail, front-center, wheelbase, bottom-bracket position, chainstay length, mass distribution, tire behavior, and steering assembly all interact. Longer trail does not automatically mean “stable,” just as a short wheelbase does not automatically mean “agile.” Engineers define the intended response—low-speed steering, high-speed confidence, cornering balance, climbing behavior—and compare complete geometries through calculation, simulation, reference bikes, and ride testing.
Sizing strategy requires individual decisions for each frame size. Straight proportional scaling can produce excessive toe overlap in small bikes, weak front-wheel loading in large bikes, or inconsistent handling across the range. Fork offset may vary by size; tube shapes and laminate schedules often should. Designers also manage size-to-size increments so that riders have meaningful choices rather than two labels around nearly identical fit.
Packaging constraints can force iteration. Larger tires push chainstays outward while crank clearance and heel clearance push them inward. A low top tube may conflict with bottle space or shock layout. A short head tube may leave insufficient room for bearings and internal hoses. Suspension bikes add leverage ratio, anti-squat, anti-rise, axle path, shock clearance, and full-travel checks. The geometry is ready for release only when fit, handling, packaging, and structural load paths have been considered together.
Carbon Layup Engineering
Carbon fiber reinforced polymer is anisotropic: its properties depend strongly on fiber direction, material form, resin system, compaction, cure, and defects. Calling a frame “high-modulus carbon” says little about how the complete structure behaves. The engineer’s real design is the laminate architecture.
Fibers oriented near the primary load direction efficiently carry tension and compression. Off-axis plies help carry shear and torsion, distribute loads, resist splitting, and stabilize the laminate. Woven material can conform well to complex regions and support damage tolerance or surface handling, while unidirectional material provides efficient directional reinforcement. Material choices are made by region and purpose rather than by a single prestige label.
The frame is divided into structural zones. The head tube and fork interface carry steering, braking, and impact loads. The bottom bracket transfers pedaling and chain forces. Dropouts carry axle, brake, and derailleur loads. Tube junctions spread load from one shell into another. Bottle bosses, cable ports, seat clamps, and suspension pivots introduce local stress concentrations. Ply orientation, length, overlap, termination, and consolidation must guide load through these discontinuities.
Computer-aided laminate analysis and finite element analysis help engineers compare architectures, identify high strains, study buckling, and evaluate load paths. Composite models must represent orthotropic materials, stacking sequence, thickness, joints, contacts, and realistic boundary conditions. A visually detailed mesh does not compensate for inaccurate material data or loads. Simulation predicts behavior under modeled assumptions; physical testing determines whether the built structure and manufacturing process match those assumptions.
Stiffness, compliance, strength, and durability are tuned together. Adding longitudinal plies to a down tube can change bending behavior but may not solve torsional weakness at a joint. A thin aero section may need local stability reinforcement. A compliant seat area needs controlled deformation without overstressing the seatpost clamp, stays, or surface plies. Abrupt thickness changes should be avoided through appropriate ply drops and transitions.
Manufacturing feasibility is part of laminate engineering. Every ply needs a defined material, orientation, shape, location, sequence, and handling method. Operators must be able to position it repeatably within the tool. Excessive numbers of tiny plies, inaccessible overlaps, sharp internal corners, and unstable preforms increase variation. The production layup book should include templates, reference marks, orientation controls, debulk steps where required, insert preparation, bladder arrangement, and traceability. A theoretically optimal laminate that cannot be built consistently is not an optimal bicycle design.
3D CAD Validation
3D CAD validation proves that the frame can coexist with all specified components, be assembled, be manufactured, and be inspected. It is a continuous discipline, not a final visual review.
The master model should use stable datums such as wheel axes, frame center plane, bottom-bracket axis, steering axis, and defined bearing seats. Component envelopes are positioned from supplier specifications wherever available. Engineers perform interference and clearance checks across operating states: steering range, suspension travel, wheel and crank rotation, derailleur movement, chain positions, seatpost insertion, bottle removal, and wheel removal.
Tolerance analysis is essential. A nominal CAD gap of 3 mm does not guarantee a 3 mm production gap. Frame molding, post-cure distortion, machining, insert location, paint thickness, component dimensions, wheel alignment, and assembly all contribute to the final stack. Critical clearances should be analyzed at worst-case or statistically justified conditions, then verified on physical samples.
Manufacturability checks consider draft, parting lines, mold access, demolding direction, bladder removal, internal mandrels, trim lines, tool shutoffs, flash control, and machining access. Tube forms must allow carbon plies to drape without unacceptable bridging or wrinkling. Tight concave radii and sudden section changes may look attractive but create consolidation risk. The designer should be able to explain how material enters, compacts, cures, and exits the tool at every region.
Assembly validation looks beyond component fit. Can a mechanic reach the brake bolts with normal tools? Can hoses be replaced without damaging the frame? Is there space for a torque wrench? Can the seatpost be inserted to the required depth without colliding with a bottle boss or tube transition? Are bearing seats supported against installation loads? Are drain paths and anti-rattle provisions present?
The CAD release should include drawings and inspection definitions for critical-to-quality characteristics: bearing-seat diameters and coaxiality, bottom-bracket dimensions, brake-mount position, dropout alignment, axle threads, seatpost fit, and key clearances. These features later connect design intent to tooling, machining fixtures, gauges, and production records.
Prototype Development and Evaluation
Prototypes answer questions that drawings and simulations cannot. They reveal how the laminate handles, how the tool closes, whether inserts move during cure, how accurately interfaces can be machined, how the bike assembles, and whether the intended ride character appears in the complete system.
Each prototype needs an explicit learning objective: exterior form, packaging, structure, or the near-production process. Every frame also needs an identifier and records for material, ply revision, operator, tooling, cure, weight, inspection, machining, assembly, and testing.
Prototype Frame Production
The first engineering samples should represent the proposed production method closely enough to expose real manufacturing risks. A visual model made by a different process can support styling approval, but it cannot validate production compaction, laminate placement, or structural behavior.
In a common carbon frame manufacturing process, pre-cut reinforcement is placed into matched tools and compacted against the mold surface using bladders, mandrels, or other internal pressure systems. Exact methods vary. Some frames are molded as a larger monocoque structure; others use separately molded sections joined through secondary bonding or overwrapping. The process choice affects tool count, joint design, internal access, surface quality, labor, and inspection.
Prototype work starts before layup. Prepreg or other reinforcement must be stored and conditioned according to its process requirements. Ply kits are cut, labeled, and protected from contamination. Inserts require surface preparation and controlled adhesive or co-cure procedures. Bladders and preforms are arranged so they hold material in position without creating trapped folds or resin-rich pockets.
During molding, temperature, time, pressure, vacuum where applicable, and tool closure influence consolidation and cure. After demolding, the frame is trimmed and machined using defined datums. Bearing seats, brake mounts, and threaded interfaces may require finishing operations. The frame then passes dimensional and visual inspection before paint or assembly.
Early samples frequently reveal practical issues: a ply shifts when the mold closes; an internal bladder bridges a corner; flash blocks a cable path; a dropout insert drifts; a bearing seat distorts after cure; or a tube is difficult to demold without damage. These findings are not merely “factory problems.” They are engineering information. The appropriate response may be a layup change, preform aid, tool revision, different parting line, revised insert fixture, or adjusted cure and machining process.
Destructive cut-ups can be especially valuable during development. Sectioning selected frames reveals internal wrinkles, voids, ply positions, resin distribution, and transitions that external inspection cannot show. Cut-up findings should be correlated with process data and nondestructive inspection so the team learns which signals reliably identify risk without destroying production parts.
Laboratory and Ride Testing
Laboratory fixtures apply controlled, repeatable loads; ride testing evaluates the complete bicycle and rider experience. The two methods answer different but complementary questions.
A structural validation and quality-control plan begins with the applicable regulatory and voluntary requirements for the intended markets. In the ISO 4210 series, ISO 4210-6:2023 specifies frame and fork test methods for relevant bicycle categories. A project may add internal tests for loads or failure modes not sufficiently represented by a baseline standard: higher rider mass, cargo, sprinting, rough-surface fatigue, disc-brake loads, rock impact, suspension bottom-out, trainer use, or combined environmental conditioning.
Test articles need configuration control. The team records frame size, laminate revision, hardware, torque, conditioning, fixture setup, load history, and result. Testing only the easiest size is risky. A small size may contain tight geometry and short load-transfer lengths; a large size may experience higher bending moments and longer unsupported spans. Engineers select worst-case sizes by load case or test multiple sizes when the governing case is uncertain.
Static stiffness tests measure displacement under defined loads at the bottom bracket, head tube, rear axle, or other interfaces. Strength, fatigue, impact, and drop tests evaluate different behaviors. Passing one does not imply passing the others. Composite damage may initiate internally without a dramatic external crack, so post-test inspection and changes in stiffness, sound, or deformation can be important.
Ride evaluation uses complete bicycles with controlled builds. Tire model and pressure, wheel stiffness, cockpit, saddle, rider mass, fit, and test route should be recorded because they affect perception. Experienced riders compare prototypes against reference bikes and structured criteria: steering response, cornering support, climbing traction, braking behavior, seated comfort, sprint response, high-speed stability, noise, and component function. Instrumentation such as strain gauges, accelerometers, position sensors, or tire-pressure monitoring can connect subjective observations to measured behavior.
Ride testing is not a substitute for safety testing. A frame can feel excellent during a short evaluation yet contain a fatigue or impact weakness. Conversely, a frame that survives a demanding lab sequence may still handle poorly or be unpleasant to service. Production approval requires both objective verification and application-relevant evaluation.
Engineering Refinements
Prototype results become valuable when they are converted into controlled engineering changes. The team compares each result with the original requirement, investigates deviations, identifies root causes, and assesses whether a change affects other requirements.
Geometry changes may address weight distribution, toe overlap, steering response, fit, or component packaging. Even small changes can propagate through the design. Changing fork offset affects trail and front-center; changing chainstay length can affect tire clearance, drivetrain packaging, handling, and molds. A geometry update therefore requires a complete impact review rather than an isolated table edit.
Layup refinements are often more targeted. Engineers may modify fiber orientation at a joint, extend a reinforcement farther into a tube, smooth a ply drop, add local protection near an impact zone, or remove redundant material where strain and testing show adequate margin. The objective is not simply to add carbon until a test passes. Excess material can create stiffness discontinuities, consolidation problems, additional weight, or new stress concentrations.
Manufacturing refinements may solve the root cause more effectively than structural additions. If test variation results from inconsistent compaction, adding plies treats the symptom and can hide a weak process. A better bladder layout, ply-position fixture, debulk step, tool vent, insert locator, or operator control may improve both strength and consistency.
Each change needs a revision identifier and verification plan. A seemingly minor cable-port change can cut load-carrying fibers or alter local molding. A paint update can change interface thickness. A different prepreg batch or supplier is not automatically equivalent. Change control asks: what requirement or risk prompted the change; which CAD, drawings, laminate files, tools, work instructions, and samples are affected; and what testing must be repeated?
Refinement ends at design freeze, not at perfection. Design freeze means the evidence supports the requirements, residual risks are understood and accepted, and the team can release a defined configuration to production tooling. Further changes remain possible, but they follow formal control because tooling and production systems now depend on the released design.
Preparing for Production
A successful prototype proves that a design can work. Production preparation proves that it can be made repeatedly at the intended rate, cost, and quality. This phase converts engineering knowledge into tools, work instructions, inspection methods, training, and process controls.
Manufacturing needs more than exterior CAD. The transfer must include laminate definitions, material handling, insert preparation, tool setup, process parameters, demolding, machining datums, inspection criteria, repair limits, traceability, and packaging requirements.
Mold Finalization
Production tooling is finalized only after the exterior geometry, part architecture, laminate strategy, and critical interfaces are approved. Committing too early can save calendar time if nothing changes, but it can also lock the team into compromises or cause expensive rework.
Mold design governs much of the frame’s repeatability. Engineers define tool material, thermal expansion, stiffness, cavity surfaces, parting lines, alignment features, pressure capacity, heating method, vents, seals, inserts, and replaceable details. The tool must maintain geometry through repeated thermal and pressure cycles while allowing safe, consistent loading and demolding.
Parting lines should support layup access and control flash without crossing critical cosmetic or functional areas unnecessarily. Shutoffs and removable cores must tolerate wear. Tool datums need to relate to downstream machining and inspection datums. If molded features cannot be held accurately enough, the design should provide machining allowance and a stable way to locate the cured frame.
Tool compensation may be necessary because composites and tool materials change dimension during heating and cooling, and asymmetric laminates can distort after release. Compensation should be based on material behavior and prototype measurement rather than arbitrary scaling. A trial tool or soft tool can provide useful data before final hard tooling, but samples from it may not behave exactly like production-tool parts.
Finalization includes tool qualification. The team inspects cavity geometry and alignment, verifies heating uniformity, runs controlled molding trials, measures the resulting parts, and records corrections. Tool maintenance is also defined: cleaning methods, release treatment, surface inspection, fastener checks, calibration, storage, and service intervals. A mold is not just the shape of the bike; it is part of the production process and must be managed as controlled equipment.
Production Process Validation
Process validation demonstrates that routine materials, operators, tools, and conditions consistently create conforming frames. An exceptionally built “golden sample” is a useful reference, but it does not establish capability.
Pilot builds should use production-intent materials, tooling, work instructions, fixtures, operators, and inspection. The team tracks cycle time, yield, rework, defects, dimensions, mass, cure data, and test results. Multiple frames across shifts or batches reveal variation that a single prototype cannot.
Critical process variables may include material out-time, ply identity and orientation, preform condition, insert preparation, adhesive quantity, bladder placement, vacuum integrity, press pressure, temperature ramp, dwell time, cooling, demolding sequence, and machining setup. The exact controls depend on the process. Limits should have an engineering basis, and records should make it possible to trace a nonconformance back to the relevant conditions.
Inspection combines complementary methods. Visual inspection can find surface defects, fiber print, cracks, resin-rich areas, contamination, and finish issues. Dimensional fixtures and coordinate measurement verify alignment and interfaces. Tapping, ultrasonics, thermography, radiography, or other nondestructive methods may be appropriate for specific regions and defect types, but each method has limitations and requires qualified procedures and interpretation. Inspection cannot compensate for an uncontrolled molding process.
Statistical thinking helps distinguish random variation from a shifted process. Critical dimensions and frame masses can be charted across pilot and production runs. Capability targets should reflect function and measurement uncertainty rather than use the same generic rule for every feature. Any out-of-specification part needs documented containment and disposition; rework or repair should be allowed only through an approved method with defined limits.
Production validation also includes structural audit testing. Not every frame is destructively tested, so scheduled samples verify that the ongoing process still produces the validated structure. Audit frequency can reflect risk, process history, material or tool changes, and volume. Final approval occurs when the process meets functional, dimensional, structural, cosmetic, throughput, and traceability requirements—not merely when enough frames have been produced to fill an order.
Branding and Finishing
Paint and graphics are part of the engineered product because they add mass, thickness, labor, chemical exposure, and inspection requirements. They also determine much of the customer’s first impression. Finishing should therefore be developed in parallel with the frame rather than added after structural approval.
The finish specification defines surface preparation, filler limits, primer, color layers, decals or masks, clear coat, gloss or texture, protected interfaces, film locations, acceptance criteria, and target mass. Sanding controls are especially important on carbon structures: aggressive surface preparation can damage load-carrying fibers. Masking must keep paint away from bearing seats, brake mounts, threads, bonding surfaces, and other controlled fits unless the dimensional design explicitly allows coating.
Graphic zones should be compatible with mold parting lines, surface curvature, hardware, protection, and size changes. A design that looks balanced on a medium frame may collide with bottle bosses or become distorted on the smallest size. Color matching and logo position need measurable references. Customer-specific personalization introduces additional revision and traceability needs so that one-off graphics do not disrupt the approved production route.
Finishing inspection separates cosmetic standards from structural concerns. A harmless pinhole in clear coat, a suspected laminate void, and a misaligned logo require different responses. Reference samples, defect catalogs, lighting conditions, viewing distances, and repair limits help inspectors make consistent decisions.
Protection and labeling complete the system. Chainstay guards, down-tube impact films, cable-entry protection, serial numbers, warnings, torque information, size labels, and regulatory markings must be positioned and verified. Packaging should prevent axle, dropout, tube, and paint damage during transport. A production-ready carbon bike reaches the rider with its engineering intent intact, not merely with a polished surface.
Common Challenges in Custom Bike Development
Most development difficulties arise at the boundaries between disciplines. A surface that benefits aerodynamics may obstruct layup. A stiffness target may conflict with comfort. A new component interface may not have stable supplier data. An impressive prototype may require more labor than the production plan allows. Recognizing these conflicts early is a sign of a healthy program, not of weak engineering.
A design and process risk register should connect potential failures and causes to controls, tests, and design reviews.
Balancing Innovation with Manufacturability
Innovation creates value only when it survives manufacturing, assembly, service, and real use. Carbon construction encourages complex shapes and integration, but every feature adds a chain of consequences.
Consider a highly sculpted tube junction. It may improve airflow and brand recognition, yet create tight radii where dry reinforcement bridges, force small plies that are difficult to position, hide internal consolidation defects, and complicate demolding. The engineer can simplify the curvature, change the parting strategy, create a stable preform, or demonstrate through trials that the process is capable. The correct response depends on whether the performance gain justifies the added risk.
Integration produces similar trade-offs. One-piece cockpits and internal hose routes can reduce frontal area and visual clutter, but may restrict fit adjustment, increase headset service time, and create noise or bend-radius problems. Proprietary seatposts allow aerodynamic or compliance tuning but increase tooling, inventory, and replacement dependence. An authority design evaluates the full product life, including crash replacement, travel, maintenance, and spare-part availability.
Structural novelty needs appropriate evidence. A new flex zone, interrupted seat tube, unusual stay configuration, or bonded modular frame may fall outside the team’s closest historical data. Simulation can guide the design, but novel failure modes call for targeted coupons, subcomponents, prototypes, and environmental or abuse tests. The more unfamiliar the concept, the less reasonable it is to rely on one standard fatigue sequence as complete proof.
Design-for-manufacture reviews should involve composite engineers, tool designers, layup technicians, machinists, finish specialists, assembly mechanics, quality engineers, and service personnel. Operators often recognize handling and access problems that are invisible in CAD. Their input does not replace engineering analysis; it improves the assumptions behind it.
A practical rule is to protect the innovation that creates rider value and simplify the features that do not. Fewer unnecessary ply shapes, accessible hardware, stable datums, common fasteners, replaceable wear parts, and generous noncritical process windows create room for the truly differentiating engineering to succeed.
Managing Development Cost and Lead Time
Development cost and lead time are controlled most effectively by scope clarity and early risk reduction. Unrealistic schedules often assume that CAD, tooling, prototypes, testing, and pilot production will each pass on the first attempt. A credible plan reserves time for learning and revalidation.
The work breakdown should include product definition, benchmark testing, geometry, industrial design, component data, structural analysis, laminate development, supplier sampling, soft or prototype tools, production tools, test fixtures, prototypes, destructive tests, ride builds, design iterations, paint development, pilot production, compliance documentation, and quality planning. Dependencies matter: a delayed cockpit envelope can hold up frame surfaces; a late geometry change can invalidate both analysis and tooling.
Program gates control financial exposure. Before releasing expensive molds, the team should confirm geometry, component packaging, surface feasibility, preliminary structure, and testing strategy. Before mass-production materials are purchased, it should confirm tool qualification and pilot capability. Gate criteria should be evidence-based and named in advance.
Cost models should use total production cost rather than material price alone. A lighter but complicated laminate may consume more cutting time, layup labor, consumables, and inspection, or produce more scrap. A cheaper tool may heat unevenly and reduce yield. A proprietary component may require additional molds, small minimum orders, and long-term spare inventory. These are engineering-economic choices, even when commercial negotiations occur elsewhere.
Change management prevents hidden schedule loss. Every requested feature should be assessed for effect on requirements, CAD, laminate, tooling, testing, finish, documentation, and launch timing. Teams can classify changes as mandatory, performance-positive, or cosmetic and require an explicit decision for late changes. Freezing interfaces earlier than cosmetic details can keep component work moving while visual refinement continues.
Contingency is not wasted time. Material qualification may fail, a prototype may expose a weakness, or a tool may require correction. Parallel work is useful when dependencies allow it—for example, developing test fixtures while prototype tooling is made—but overlapping production tooling with unresolved structural design transfers risk rather than removing it.
Maintaining Consistency Across Production
Commercial success depends on the bicycle delivered to the thousandth rider behaving like the bicycle approved during development. Carbon frames are sensitive to material handling and process execution, so consistency must be designed into both the part and the factory system.
Variation begins with incoming material. Reinforcement type, resin content, tack, storage history, out-time, backing, and cut accuracy can affect handling and cure. Inserts and adhesives need controlled specifications. Approved suppliers, receiving inspection, lot traceability, freezer records where relevant, and shelf-life controls establish the foundation.
Layup consistency depends on unambiguous work instructions and error-proofing. Ply kits need clear identities and orientation marks. Templates and fixtures locate critical reinforcements and inserts. The sequence should make missing or reversed plies difficult. Training, qualification, clean working conditions, and in-process checks matter because many laminate details are hidden after mold closure.
Molding consistency requires calibrated sensors and equipment, maintained seals and tools, controlled process recipes, and reviewable cure records. Machining consistency requires stable datums, verified fixtures, tool-life controls, and gauges suited to the tolerance. Finishing and assembly need the same discipline: coating thickness, masking, adhesive cure, fastener torque, bearing installation, and final alignment all affect function.
Quality plans distinguish critical, major, and cosmetic characteristics. Safety-critical interfaces may receive 100% inspection, while stable noncritical dimensions may be sampled. Measurement systems themselves should be checked for repeatability and accuracy; a noisy gauge can make a capable process look unstable or allow a poor process to appear acceptable.
When a defect occurs, traceability limits uncertainty. A serial number should connect the frame to material lots, layup revision, molding record, machining, inspection, finishing, and final assembly. Root-cause analysis should lead to corrective action and effectiveness checks. Simply sorting bad parts from good ones does not prevent recurrence.
Consistency also extends beyond launch. Tool wear, new operators, alternate materials, supplier changes, higher production rates, and accumulated rework can shift the process. Periodic audits, dimensional trends, destructive sample tests, field feedback, warranty data, and controlled engineering changes keep the production product aligned with the validated design.
Why Engineering Experience Matters
Custom carbon bike development depends on engineering judgment built through analysis, manufacturing observation, testing, failure investigation, and repeated production feedback. Software can calculate and machines can shape molds, but neither determines which assumptions are unsafe, which detail will be difficult to consolidate, or which test result represents a real product risk.
Experienced teams understand that carbon is a process-dependent structure. The same exterior frame shape and nominal fiber content can produce different results when ply orientation, overlap, compaction, cure, insert preparation, or machining changes. They connect the digital laminate to what an operator can actually build and to what an inspection method can actually detect.
Experience also improves problem definition. A complaint that a bike feels “soft” might involve frame torsion, wheels, tires, cockpit, fit, or even expectations. A failed fatigue sample might result from insufficient laminate, a local wrinkle, a fixture error, a machining defect, or an incorrect assembly torque. Adding material without determining the cause may increase weight without making production safer.
Cross-functional knowledge is particularly valuable at interfaces. Geometry specialists must understand component envelopes. Composite engineers must understand tooling and cure. Manufacturing engineers must understand the structural importance of ply placement. Quality teams must understand which dimensions and defects are functionally critical. Test engineers must understand how fixtures represent—or distort—real loads. No single specialty can make a complete bicycle production-ready in isolation.
Engineering experience is visible in the questions asked before commitment: which rider and load governs each size; what evidence supports the targets; where tolerances are tightest; how plies and inserts will be controlled; whether the prototype represents production; and which changes require renewed testing.
Continuous validation turns those questions into a durable product. Early calculations guide concepts. CAD validates packaging. Laminate models guide structure. Prototype manufacturing tests process assumptions. Laboratory and ride testing test performance assumptions. Pilot production tests repeatability. Field data then tests the combined system over time.
This is why producing a mold or a visually complete prototype is not the same as developing a bicycle. Tooling captures geometry. Engineering establishes why that geometry, laminate, interface, and process should produce the intended outcome—and quality management verifies that the outcome continues in production.
Conclusion
Custom bike development transforms an idea into a reliable production bicycle through defined, testable decisions. It begins with the rider, application, priorities, component ecosystem, market requirements, and trade-offs, then converts them into geometry, laminate architecture, 3D packaging, and manufacturable details.
Prototypes provide the first physical evidence, but they are not the finish line. Laboratory testing verifies controlled structural behavior; ride testing evaluates the integrated bicycle; cut-ups and inspections reveal manufacturing reality; and engineering refinement brings the design into alignment with its requirements. Only after that learning should production tooling and the final manufacturing route be locked.
Production readiness means more than passing a test once. It means that tools, materials, operators, process parameters, machining, finishing, inspection, and traceability can repeatedly create the approved product. Pilot builds, capability data, audit testing, and change control protect the link between the validated prototype and every frame made afterward.
The most successful carbon bikes are therefore not the result of one isolated breakthrough. They are the result of coordinated geometry, composite engineering, component integration, testing, manufacturing knowledge, and quality management. When those disciplines remain connected from concept through series production, custom bike development can deliver a bicycle that is distinctive, high-performing, serviceable, durable, and dependable—not only in a design presentation, but under real riders over time.