What is a suspension fork on the bike?
A suspension fork on a bike is a front fork system that incorporates shock-absorbing components—typically a combination of springs and dampers—to reduce the impact of bumps and uneven terrain on the front wheel. A suspension fork was first popularized in the early 1990s by RockShox in the United States to enhance control, comfort, and traction for mountain biking; since then, it has evolved with advanced technologies like air or coil springs, hydraulic damping, and lockout systems, making it a critical component for off-road, trail, and downhill bikes.
How do suspension forks work?
Suspension forks work by compressing under load through a combination of a spring system (air or coil) and a damping mechanism (usually hydraulic) to absorb shocks from uneven terrain. Suspension movement involves key parts like the stanchions, lowers, crown, bushings, and damping cartridges, providing improved traction, control, and comfort by reducing impact forces transmitted to the rider and maintaining front wheel contact with the ground.
What are suspension forks for?
Suspension forks are designed to absorb shocks and vibrations from rough terrain, improving control, comfort, and traction, especially in disciplines like mountain biking (XC, trail, enduro, downhill), gravel biking, dirt jumping, and even some commuter or e-bikes. Suspension forks enhance rider performance and reduce fatigue by allowing the front wheel to stay in better contact with the ground, which is critical when navigating uneven surfaces, rocky trails, or high-speed descents.
What is a hardtail suspension fork?
A hardtail suspension fork is a front shock-absorbing component designed to provide cushioning for the front wheel, while the rear of the bike remains rigid (no rear suspension). This design emerged prominently in the 1990s, especially in the U.S. and Europe, as a cost-effective and lightweight solution for cross-country (XC) and trail riders who needed improved front-end control without the added complexity or weight of full suspension systems.
What does Preload mean on suspension forks?
Preload refers to the initial tension applied to the suspension fork’s spring (coil or air) to adjust how much it compresses under the rider’s weight before encountering bumps. It affects sag (the amount the fork compresses under static load), and properly setting preload ensures optimal suspension response, maintaining traction and comfort while avoiding bottoming out or excessive stiffness on varying terrains.
What is a lockout suspension fork?
A lockout suspension fork is a type of bike suspension fork that includes a mechanism to disable or “lock” the fork’s travel, preventing it from compressing under load. This feature—controlled manually or remotely—improves pedaling efficiency on smooth surfaces or climbs by eliminating suspension bob, and is especially valuable in cross-country, road, or hybrid bikes where energy conservation and speed are priorities.
How important is suspension on a bike?
Suspension is crucial on a bike when riding over rough terrain, as it absorbs impacts, increases comfort, and enhances control by allowing the wheels—via the suspension fork and rear shock—to track the ground more precisely. It reduces rider fatigue, improves traction and braking on technical trails, and adds value, especially in mountain biking, gravel riding, and enduro racing, where performance and safety are directly influenced by suspension efficiency and travel.
Do all suspension forks fit all bikes?
No, not all suspension forks fit all bikes because they come in different steerer tube diameters (e.g., 1″, 1 1/8″, tapered), axle types (e.g., quick release, thru-axle), and travel lengths (e.g., 80mm to 200mm), which must match the bike frame and wheel setup. Compatibility also depends on the head tube design, brake mount type (post mount or IS), and wheel size (26″, 27.5″, 29″), making it essential to match all components precisely for safe and efficient performance.
Do all bikes have a suspension fork?
No, not all bikes have a suspension fork because many road bikes, fixies, BMX, and commuter bikes are designed for smooth pavement, where rigid forks are lighter, more efficient, and better suited. Suspension forks are typically found on mountain bikes and some gravel or hybrid bikes where terrain irregularities demand shock absorption.
What are the advantages of a bike suspension fork?
The advantages of a bike suspension fork include increased comfort, improved control, better traction, reduced fatigue, and enhanced safety on rough terrain because the fork absorbs shocks and vibrations from obstacles like rocks, roots, and potholes, allowing the rider to maintain grip, stability, and ride quality.
- Comfort: Suspension forks absorb bumps and impacts, reducing vibrations transmitted to the rider’s hands and arms for a smoother experience.
- Control: By keeping the front wheel in contact with the ground, suspension forks improve handling and steering precision, especially on technical trails.
- Traction: The ability to maintain tire contact over uneven surfaces helps prevent sliding and increases cornering grip.
- Fatigue Reduction: Absorbing trail shocks reduces strain on the rider’s upper body, allowing longer rides with less muscle exhaustion.
- Safety: Suspension forks minimize jolts and deflections from obstacles, decreasing the risk of crashes or loss of control.

What are the disadvantages of a bike suspension fork?
The disadvantages of a bike suspension fork include added weight, increased cost, more maintenance, reduced efficiency on smooth surfaces, and potential for mechanical failure because suspension forks introduce complexity and moving parts that can affect pedaling performance and require regular care.
- Weight: Suspension forks are heavier than rigid forks due to internal damping systems, which can slow down acceleration and climbing efficiency.
- Cost: They are more expensive to manufacture and purchase, especially air or high-performance models with advanced features.
- Maintenance: Suspension forks require routine servicing (like oil changes and seal inspections) to maintain performance and prevent damage.
- Efficiency: On flat or paved roads, energy is lost in suspension movement, making them less efficient than rigid forks for commuting or racing.
- Mechanical Failure: With more moving parts, there’s a higher risk of issues like leaking seals or broken lockouts, especially if not properly maintained.

What are bike suspension forks made of?
Bike suspension forks are typically made of aluminum, carbon fiber, steel, magnesium, and sometimes titanium—each selected for balancing strength, weight, cost, and performance depending on the bike type and riding discipline.
- Aluminum: Used widely for mid-range forks due to its light weight, corrosion resistance, and affordability—common in XC and trail bikes.
- Carbon Fiber: Favored for high-end forks in racing and gravel bikes because of its low weight, vibration damping, and stiffness, though it’s more expensive.
- Steel: Durable and strong, often found in budget or older models, offering a compliant ride but adding more weight.
- Magnesium: Commonly used in fork lowers for its lightness and strength-to-weight ratio, often seen in performance mountain bikes.
- Titanium: Rare and premium, valued for combining strength, shock absorption, and corrosion resistance, but typically reserved for custom or high-cost builds.
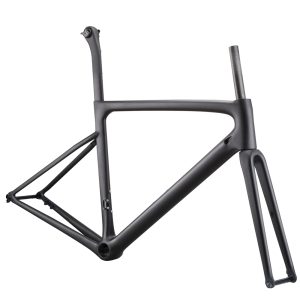
Bike suspension fork diagram
A bike suspension fork diagram is important because it visually clarifies how critical components like the spring, damper, and lockout interact to absorb shocks, maintain traction, and optimize rider control over varied terrain, helping cyclists better understand performance tuning and maintenance.

- Lockout: A switch or dial that disables suspension movement, improving pedaling efficiency on smooth surfaces or climbs.
- Spring: The component (coil or air) that compresses under impact to absorb shocks and return to its original position for continuous suspension action.
- Damper: Controls the speed of compression and rebound, preventing the fork from bouncing uncontrollably after absorbing a shock.
- Travel: The maximum distance the suspension fork can compress, measured in millimeters, indicating how much shock absorption is available.
- Rebound Damping: Adjusts how quickly the fork returns to its full length after compression, affecting stability and control.
- Compression Damping: Regulates the rate at which the fork compresses under load, helping to absorb impacts smoothly without bottoming out.
What is the offset on a suspension fork?
The offset on a suspension fork is the horizontal distance between the steering axis (centerline of the steerer tube) and the front axle, typically measured in millimeters (e.g., 42mm, 44mm, 51mm). This offset influences the bike’s trail, which affects handling characteristics—a shorter offset increases trail for more stability at high speeds, while a longer offset reduces trail for quicker, more responsive steering, especially valuable in technical terrain or tight corners.
How much can you lengthen a suspension fork?
You can lengthen a suspension fork by up to 10–20mm beyond the original travel length, depending on the fork’s design and manufacturer specifications, but only if the fork allows for internal travel adjustments or has swappable air shafts. However, increasing fork travel affects the bike’s geometry—such as raising the front end, slackening the head tube angle, and increasing the bottom bracket height—which can improve downhill performance but may compromise climbing efficiency, handling balance, and warranty coverage if overextended.
What is suspension fork travel?
Suspension fork travel refers to the maximum distance the fork can compress to absorb impacts, typically measured in millimeters, and represents how much vertical movement the front wheel can undergo to cushion rough terrain. Suspension travel became a defined concept in the early 1990s during the rise of mountain biking in regions like Colorado and California, with pioneers like RockShox and Manitou standardizing it as a key performance metric; it’s called “travel” because it describes how far the fork “travels” when absorbing a shock force.
| Travel (mm) | Typical Application |
| 40mm | Urban bikes, hybrid bikes, light gravel riding |
| 50mm | Comfort city bikes, entry-level commuter bikes |
| 80mm | Cross-country (XC) bikes, lightweight trail bikes |
| 100mm | XC racing bikes, short-travel trail bikes |
| 120mm | Trail bikes, aggressive XC, downcountry bikes |
| 130mm | Trail bikes, all-mountain bikes |
| 135mm | Transition between trail and all-mountain use |
| 140mm | All-mountain bikes, technical trail terrain |
| 150mm | Enduro bikes, aggressive downhill trail riding |
| 160mm | Enduro racing, steep and rough terrain |
| 200mm | Downhill racing bikes, extreme gravity riding |

How do you measure your MTB fork’s travel?
You can measure your MTB fork’s travel by using a simple ruler or measuring tape and checking the distance the fork can compress. First, locate the exposed stanchion tube (the shiny upper part of the fork) and measure from the bottom of the dust seal to the bottom of the fork crown—this is the maximum usable length, which equals the fork’s travel.
To confirm, you can also compress the fork fully (either by sitting on the bike or pushing down with force), then measure how far the stanchion slides into the lower leg. For a more precise method, use a zip tie: place it snugly around one stanchion, compress the fork fully, and then measure the distance from the zip tie to the seal once uncompressed. Common travel lengths for MTB forks are 100mm, 120mm, 140mm, or more depending on bike type.
Types of bike suspension forks
The types of bike suspension forks can be categorized by bike type (gravel, fat, mountain, BMX, road, e-bike, downhill), wheel size (16, 20, 24, 26, 27.5, 27.5+, 29, 29+ inches), steerer tube type (straight, tapered), and suspension mechanism (air, coil). These classifications exist to ensure compatibility with specific frame geometries, intended riding styles, and performance demands across different cycling disciplines.
Bike suspension fork sorted by bike type
Bike suspension forks are sorted by bike type into gravel, fat, mountain, BMX, road, e-bike, and downhill categories to match the unique performance, terrain, and geometry demands of each cycling discipline.
- Gravel suspension fork: Designed for mixed-terrain riding, gravel forks offer limited travel (typically 30–60mm) with light damping to smooth out rough paths and maintain efficiency.
- Fat suspension fork: Built to handle wide tires and loose surfaces, fat bike suspension forks provide stable damping with reinforced crowns and long axle spacing.
- Mountain suspension fork: Mountain bike forks range widely in travel (100–180mm) and are built for varied off-road use, from XC to enduro and aggressive trail riding.
- BMX suspension fork: BMX forks are typically rigid but when suspended, they’re compact and reinforced to absorb impacts from jumps and tricks without compromising control.
- Road suspension fork: Suspension forks for road bikes are rare but available for endurance or rough-pavement models, offering minimal travel for vibration damping.
- E-bike suspension fork: E-bike forks are reinforced to handle added weight and motor torque, often with wider stanchions and stronger dampers for urban or trail use.
- Downhill suspension fork: Downhill forks are dual-crown, long-travel (up to 200mm), and built for absorbing extreme impacts at high speeds on steep, technical descents.
Bike suspension fork sorted by wheel size
Bike suspension forks are sorted by wheel size into 16”, 20”, 24”, 26”, 27.5”, 27.5+, 29”, and 29+ inch categories to ensure compatibility with specific bike geometries, rider sizes, and terrain demands.
- 16“ suspension fork: Designed for kids’ bikes or compact BMX setups, offering minimal or no suspension for basic bump absorption.
- 20” suspension fork: Common on BMX, youth mountain bikes, or small dirt jump bikes, offering short travel for light terrain.
- 24“ suspension fork: Suited for junior mountain bikes or smaller adult frames, balancing comfort and control with moderate travel.
- 26er suspension fork: Traditional standard for older MTBs and still used in dirt jumping or freeride, offering good agility and compatibility.
- 27.5er suspension fork: Popular for modern trail and enduro bikes, offering a balance between rollover and maneuverability.
- 27.5er plus suspension fork: Designed to fit wider tires (2.8–3.0”), offering more grip and cushioning for rugged trails or e-bikes.
- 29er suspension fork: Standard on XC, trail, and enduro bikes, offering efficient rolling and traction over rough terrain.
- 29er plus suspension fork: Supports extra-wide tires and heavy-duty use, ideal for bikepacking or snow/sand riding with added comfort.
Bike suspension fork sorted by steerer types
Bike suspension forks are categorized by steerer types into straight steerer and tapered steerer, as these affect compatibility with bike frames and determine handling stiffness and performance.
- Straight steerer suspension fork: Features a uniform diameter (typically 1 1/8″) from top to bottom, commonly found on older or entry-level bikes, offering simplicity and broad headset compatibility.
- Tapered steerer suspension fork: Widens from 1 1/8″ at the top to 1.5″ at the bottom, providing increased front-end stiffness, better handling, and is now the standard for most modern performance bikes.
Straight steerer vs tapered steerer suspension fork
Straight steerer vs tapered steerer suspension forks are often compared because the steerer tube type affects bike compatibility, stiffness, handling, and future upgrade potential. Riders need to understand the differences when choosing a fork or frame, especially for performance and maintenance.
| Feature | Straight Steerer Fork | Tapered Steerer Fork |
| Compatibility | Fits older or budget frames and headsets | Fits modern frames with larger head tubes |
| Stiffness | Less torsional stiffness | Increased front-end stiffness and control |
| Weight | Slightly lighter due to uniform shape | Slightly heavier but offers performance gains |
| Handling | Less precise on rough terrain | More precise, especially on descents |
| Upgrade potential | Limited due to older standard | Easier to upgrade in modern setups |
| Common sizes | Typically 1 1/8″ straight | 1 1/8″ to 1.5″ tapered |
| Use case | Recreational, city, older MTB builds | Trail, enduro, downhill, modern MTB builds |

Bike suspension fork sorted by mechanism
The bike suspension fork types sorted by mechanism include air suspension forks and coil suspension forks, which are categorized based on the internal spring system used to absorb impacts. This classification helps riders choose the ideal fork for their terrain, riding style, performance preference, and maintenance needs.
- Air suspension fork: Uses compressed air as the spring medium, offering lightweight performance and tunability with a shock pump, ideal for cross-country, trail, and all-mountain riding.
- Coil suspension fork: Uses a steel or titanium coil spring to absorb shocks, providing consistent performance and durability, preferred in downhill, freeride, and aggressive trail applications.
Air vs coil fork suspension
Air and coil suspension forks are compared because they represent the two main internal spring systems used in bike suspension, each offering distinct performance traits, maintenance demands, and suitability for different riding styles and conditions. Riders often evaluate them based on adjustability, weight, responsiveness, durability, and cost to match their terrain and discipline needs.
| Feature | Air Suspension Fork | Coil Suspension Fork |
| Weight | Lighter, due to air chamber | Heavier, due to metal coil spring |
| Adjustability | Highly adjustable with shock pump | Limited adjustment, requires spring swap |
| Small Bump Sensitivity | Less sensitive over small bumps | More plush and sensitive to small impacts |
| Maintenance | Requires regular air pressure checks and seals maintenance | Low maintenance, mechanically simpler |
| Cost | Usually more expensive for high-end models | More affordable at mid-range performance levels |
| Use Case | Ideal for XC, trail, and weight-conscious riders | Best for downhill, enduro, and aggressive terrain |

How do you choose a bike suspension fork?
You can choose a bike suspension fork by considering key features such as wheel size, travel, fork steerer tube diameter, axle size, compatibility with your MTB frame, your riding style and terrain, and the fork’s weight, material, and overall durability—each of which affects performance, fit, and long-term value.
- Wheel size: Match the fork to your bike’s wheel size (e.g., 27.5″, 29″) to ensure proper fit and handling.
- Travel: Choose fork travel (e.g. 100–160mm) based on terrain and discipline—shorter for XC, longer for trail or enduro.
- Fork steerer tube diameter: Check whether your frame requires a straight or tapered steerer for a secure and stable connection.
- Axle size: Confirm hub and dropout compatibility (e.g,. 15x100mm, 15x110mm Boost) to ensure the axle fits properly.
- Compatibility with your MTB: Make sure the fork matches your bike’s head tube angle, frame geometry, and intended use.
- Consider your riding style and terrain: Select based on whether you ride XC, trail, downhill, or all-mountain, which influences stiffness and damping needs.
- Weight, material, and durability: Lighter air forks in carbon or aluminum are ideal for climbing and XC, while heavier coil or steel options offer better downhill strength and longevity.

How do you select the bike suspension fork for a mountain bike?
You can select a bike suspension fork for a mountain bike by matching the fork’s travel, wheel size, steerer type, axle type, and damping system to your riding style, terrain, and frame geometry. Consider whether you ride cross-country, trail, enduro, or downhill, as each requires specific suspension performance in terms of stiffness, responsiveness, and durability.
Suspension fork vs rigid fork, which is better?
Suspension fork vs. rigid fork is a common comparison because they serve different purposes based on terrain, riding style, comfort needs, and bike type. Suspension forks are ideal for absorbing shocks on rough trails, while rigid forks are preferred for smoother surfaces, lighter weight, and simplicity in maintenance.
| Feature | Suspension Fork | Rigid Fork |
| Comfort on Rough Terrain | High – absorbs shocks, better for trails | Low – no shock absorption, bumpy ride |
| Weight | Heavier due to suspension components | Lighter, made of fewer parts |
| Maintenance | Requires regular servicing (seals, oil, etc.) | Minimal maintenance |
| Efficiency on Smooth Roads | Less efficient due to energy loss in compression | More efficient, direct power transfer |
| Versatility | Best for mountain/trail/downhill bikes | Best for city, gravel, touring, or fat bikes |

Are front suspension forks necessary?
No, front suspension forks are not necessary if you ride mostly on paved roads, gravel paths, or light trails where a rigid fork offers better pedaling efficiency, lighter weight, and more direct power transfer, but suspension forks are useful for absorbing impacts and improving control on technical terrain or mountain biking trails with 100–160 mm of travel.
Are suspension forks on a road bike good against potholes?
No, suspension forks on a road bike are not good against potholes if you’re riding a traditional road bike where added fork suspension compromises weight, speed, and stiffness, but in urban or endurance bikes, features like micro-suspension or compliance systems (e.g., Future Shock, IsoSpeed) with wider tires (28–32 mm) at lower pressures offer better pothole absorption without full suspension.
Do I need a suspension fork for a fat bike?
No, you need a suspension fork for a fat bike if you’re riding in snow, sand, or soft terrain where fat tires (up to 5″) at low pressure (5–15 PSI) already provide natural shock absorption, but suspension forks like the RockShox Bluto (100 mm travel) can enhance comfort and control on rough summer trails or rocky surfaces.
Do I need a front suspension fork for mountain trails?
Yes, you need a front suspension fork if you’re riding typical mountain trails with rocks, roots, and drops where suspension (100–160 mm travel) improves control, comfort, and safety, but you don’t if you’re only riding smooth, hard-packed trails and prioritize lightweight efficiency over shock absorption.
Do you need a gravel suspension fork?
No, you don’t need a gravel suspension fork if you ride mostly on packed dirt, mixed surfaces, or light off-road terrain where wider tires (38–50 mm) at lower pressures already provide sufficient comfort and control, but you do if you regularly ride rough, rocky, or technical gravel routes where a short-travel suspension fork (e.g., 30–60 mm) can reduce fatigue and improve handling.
Do you need suspension-corrected geometry?
Yes, you need suspension-corrected geometry if you’re using or planning to switch between a suspension fork and a rigid fork, as it maintains proper frame angles, handling, and bottom bracket height by accounting for the axle-to-crown length of the suspension fork, but you don’t if your frame is strictly designed for rigid use with no intention of adding a suspension fork.
How good is RockShox suspension fork technology?
RockShox is a leader in MTB suspension, known for combining advanced damping, air spring design, and smart technology to deliver performance, comfort, and control across every discipline—from XC racing to aggressive enduro.
- Dampers: RockShox dampers control compression and rebound to fine-tune how the fork behaves over terrain. High-end options like Charger 3 offer independent high- and low-speed compression and rebound adjustments for precision tuning. The Charger Race Day is ultra-light for XC racing with a firm lockout, while RC2/RC dampers deliver smooth, controlled performance for trail, enduro, and DH.
- ButterCups: Integrated into select high-end forks, ButterCups are rubber pucks that reduce high-frequency vibration before it reaches the rider. They filter out up to 20% of trail chatter, reducing hand fatigue and improving comfort, especially on long or technical descents.
- DebonAir+ Spring: An upgrade over the original DebonAir, the DebonAir+ air spring provides a more refined spring curve, better mid-stroke support, and more resistance to bottom-out. It maintains plushness on small bumps while feeling more supportive under hard hits—ideal for trail and enduro riders.
- DebonAir Spring: The original DebonAir spring focused on maximizing small bump compliance and plush initial stroke. It delivered a very supple ride feel but could lack mid-stroke support for aggressive riders—leading to the development of DebonAir+.
- SoloAir Spring: SoloAir uses a single Schrader valve to fill both positive and negative air chambers, automatically balancing them. It’s lightweight and easy to set up, making it perfect for beginner to intermediate riders using forks like Recon, Judy, or SID Select.
- Pressure Release Valves: These small valves on forks like the ZEB, Lyrik, and Pike Ultimate allow riders to manually bleed off excess pressure caused by altitude or temperature changes. They keep fork performance consistent and prevent harshness or loss of small bump sensitivity.
- Flight Attendant: RockShox’s top-tier innovation, Flight Attendant, is a wireless, automatic suspension system that uses sensors to switch between Open, Pedal, and Lock modes in real time based on rider input and terrain. Integrated with SRAM AXS, it improves efficiency without requiring manual adjustments—perfect for racers or performance-focused trail/enduro riders.
How do you install a bike suspension fork?
You can install a bike suspension fork by following key steps such as removing the old fork, cutting the new steerer tube, installing the star nut or compression plug, pressing in the crown race, greasing and inserting the fork into the head tube, adding spacers and the stem, preloading the headset, and tightening all bolts to spec—each step ensures a safe, precise fit and optimal performance on the trail.
- Remove the old fork: Loosen stem bolts, remove the top cap, take off the spacers and stem, and slide the old fork out of the head tube using a 4mm or 5mm Allen wrench.
- Cut the new steerer tube: Measure the correct steerer length with spacers and stem in place, mark it, and cut it straight using a saw guide and hacksaw with a blade appropriate for carbon or alloy.
- Install the star nut or compression plug: Use a star nut setter to tap in the star nut for alloy steerers, or insert a compression plug with a hex key for carbon steerers to anchor the top cap bolt.
- Press in the crown race: Slide the crown race onto the fork crown and press it flush using a crown race setting tool or a length of PVC pipe and a mallet.
- Grease and insert the fork: Lightly grease the steerer tube and headset bearings, then slide the fork into the head tube, ensuring bearings are seated properly and facing the correct direction.
- Install spacers and stem: Stack spacers as needed on the steerer tube, install the stem, and leave 2–3mm of steerer above the stem for top cap clearance.
- Preload the headset: Insert the top cap and gently tighten the preload bolt (2–4 Nm) until there’s no play in the headset and the fork rotates smoothly without binding.
- Tighten all bolts to spec: Align the stem with the front wheel and torque the stem clamp bolts evenly to the manufacturer’s spec (typically 5–6 Nm) using a torque wrench to ensure secure and safe clamping.
How do I correctly set up a suspension fork?
You can correctly set up a suspension fork by adjusting the sag using an air pump to match your weight (typically 20–30% of fork travel), setting rebound so the fork returns smoothly without bouncing (often using a red dial), fine-tuning compression damping for desired firmness, and regularly checking air pressure, travel, and seal condition to maintain optimal performance for your terrain and riding style.
Can you put a suspension fork on a rigid bike?
Yes, you can install a suspension fork if the new fork matches your bike’s wheel size, steerer tube type (straight or tapered), axle/hub standard, and head tube dimensions, but you may affect the geometry (like head tube angle and bottom bracket height), which can alter handling and may require a suspension-corrected geometry frame for optimal performance.
How do you change a suspension fork?
You can change a suspension fork by removing the front wheel, brakes, stem, and spacers, sliding out the old fork, then transferring or installing the crown race, cutting the new fork’s steerer to length, inserting a star nut or compression plug, and finally reassembling everything in reverse order, ensuring proper headset preload, torque specs, and compatibility with your bike’s geometry and axle type.
Is it bad to put suspension forks upside down?
Yes, it is bad to install standard suspension forks upside down if they are not specifically designed as inverted forks, because this orientation can cause oil drainage, bushing misalignment, and sealing issues, but inverted suspension forks like the RockShox RS-1 or Manitou Dorado are engineered to work in that configuration with proper internal oil flow and support.
How do you adjust the suspension fork on a bike?
You can adjust the suspension fork on a bike by setting the sag, adjusting air pressure, fine-tuning rebound and compression damping, and checking for proper travel and seal condition—all of which affect ride quality, control, and responsiveness.
- Set the sag: Wear your full riding gear, sit naturally on the bike, and use the sag o-ring or a zip tie to measure how much the fork compresses—aim for 20–30% of total travel depending on your riding style.
- Adjust air pressure: Use a shock pump with a pressure gauge to increase or decrease air pressure through the Schrader valve until your sag is within the recommended range for your weight.
- Fine-tune rebound damping: Turn the red rebound knob (usually at the bottom of the fork leg) to control how fast the fork returns after compression—slower rebound for rough trails, faster for smooth flow.
- Adjust compression damping: Use the blue compression knob (typically on top of the fork) to make the fork stiffer (clockwise) or plusher (counter-clockwise), depending on terrain and riding conditions.
- Check fork travel: Cycle the fork fully through its stroke by pressing it down hard to ensure you’re using most of the available travel during riding, but not bottoming out harshly.
- Inspect seals and stanchions: Check that the dust seals and stanchion tubes are clean, smooth, and free of oil leaks or dirt buildup—dirty seals can lead to poor performance or wear.

How do you adjust air suspension forks?
You adjust air suspension forks by using a shock pump to increase or decrease the air pressure through the Schrader valve, setting the correct sag (usually 20–30% of fork travel) based on your rider weight and style. Fine-tune rebound (red knob) and compression damping (blue knob or dial) to control how the fork reacts to terrain, balancing comfort, control, and efficiency.
How do you adjust a coil suspension fork?
You adjust a coil suspension fork by changing the preload with a dial or adjuster on top of the spring side, compressing the coil to increase stiffness for heavier riders or harder impacts. Additional adjustments include rebound and sometimes compression damping, but unlike air forks, spring rate is fixed unless you physically swap out the coil for a firmer or softer one.
How do you set up a Fox fork suspension?
To set up a Fox fork, first use the Fox tuning guide or app to determine starting air pressure, then set your sag with full gear on and adjust using a high-pressure shock pump. Follow by dialing in rebound damping (usually numbered clicks on a red knob) and compression (blue lever or dial), and if your fork has GRIP2, you can fine-tune both high-speed and low-speed compression and rebound independently.
How do you lock out a suspension fork?
You lock out a suspension fork by turning the blue lockout lever (usually on the top of the right fork leg or on the handlebar for remote systems) fully clockwise, which closes the compression circuit and prevents the fork from compressing under pedaling load. This improves pedaling efficiency on smooth climbs or pavement but may reduce traction on rough surfaces.
How do you pump up suspension forks?
You pump up suspension forks by attaching a dedicated shock pump to the fork’s air valve, adding air slowly while monitoring the built-in gauge until you reach the desired PSI based on your weight and riding style, then removing the pump carefully to avoid air loss. Always recheck sag after pumping to ensure the fork is correctly pressurized for your body weight and terrain.
How do you fix a bike suspension fork?
You fix a bike suspension fork by first identifying the issue—such as oil leaks, reduced travel, stiff movement, or play in the bushings—then performing basic maintenance like cleaning the stanchions, replacing dust wipers and oil seals, and changing the suspension oil. For air forks, you may also need to check or replace the air spring, O-rings, or damper internals, using manufacturer-specific service kits and a torque wrench to reassemble parts correctly.
How do you repair a Bike fork suspension?
You repair a bike fork suspension by disassembling the fork with proper tools (such as seal drivers, syringes, Allen keys, and a pick set), cleaning internal parts thoroughly, inspecting for worn components like bushings or damping rods, and replacing damaged parts using a fork service manual and OEM kits. Proper re-lubing and re-torquing bolts to spec is crucial to restore smooth performance and ensure long-term reliability of the fork under riding loads.
How often should you service your bike suspension fork?
You should service your bike suspension fork every 50 hours of riding (or approximately every 500–800 km / 300–500 miles) for a lower leg service, which includes replacing the dust wipers, cleaning the stanchions, and refreshing the lubricating oil to maintain smooth travel and prevent premature wear.
How long do suspension forks last?
You can expect suspension forks to last between 3 to 8 years or 15,000–25,000 km (9,000–15,000 miles) with regular servicing, depending on the quality of the fork, your riding conditions, and how well you maintain components like bushings, seals, and the damping system.
How often should a suspension fork be overhauled?
You should fully overhaul a suspension fork every 100–200 hours of ride time (roughly every 1,000–2,000 km / 600–1,200 miles), which includes disassembling the damper and air spring, replacing internal seals, changing damper oil, and inspecting bushings for wear to ensure long-term performance and reliability.
How much does it cost to rebuild a suspension fork?
You can expect to pay between $80–$200 / €75–€185 / £65–£170 to rebuild a suspension fork, depending on the fork model, service depth, and whether you do it yourself or hire a professional.
DIY Rebuild
- Parts & fluids only: $30–$80 / €28–€75 / £25–£65 (Includes service kits with seals, foam rings, oil)
- Tools (if needed): Add $50–$100 / €45–€95 / £40–£85 (Shock pump, seal driver, torque wrench, etc.)
Professional Rebuild (Bike Shop or Suspension Specialist)
- Basic lower leg service: $50–$100 / €45–€95 / £40–£85 (Cleans, replaces seals/oil, inspects fork)
- Full rebuild (including damper and air spring): $120–$200 / €110–€185 / £100–£170 (Common for high-end forks like Fox 36, RockShox Pike Ultimate, etc.)
Bike suspension fork brands and manufacturers
Suspension forks have revolutionized modern cycling, especially in mountain biking, by improving comfort, traction, and control across rough terrain. Since the 1980s, numerous brands have innovated in damping technology, air springs, chassis stiffness, and tuning adjustability. Each manufacturer brings its own engineering philosophy, serving specific riding styles from cross-country (XC) to enduro and downhill (DH). This table highlights the key players, their origins, and what makes each brand stand out.
| Brand | Since | Country/Region | Special Features / Notes |
| Cane Creek | 2005 (suspension) | USA (North Carolina) | Known for Helm fork, modular design, user-tunable air spring system, and rider serviceability. |
| Cannondale | 1997 (HeadShok) | USA (Connecticut) | Unique Lefty single-leg forks, integrated with Cannondale frames, lightweight and stiff. |
| DVO Suspension | 2012 | USA (California) | Founded by ex-Marzocchi engineers, offers high-performance DH and enduro forks, externally tunable. |
| Fox Racing Shox | 2001 | USA (California) | Industry leader in premium MTB forks, GRIP2 dampers, FIT4, Kashima coating, and wide OEM support. |
| Manitou | 1990 | USA | Pioneered early MTB forks; modern Mezzer fork is highly adjustable and lightweight for enduro. |
| Marzocchi | 1949 (susp.) | Italy (now under Fox) | Once dominant in DH; known for coil plushness, revived under Fox with budget-friendly performance. |
| Öhlins | 1976 (MTB: 2015) | Sweden | Renowned in motorsport; brings coil-sprung DH precision and TTX twin-tube dampers to MTB. |
| RockShox | 1989 | USA (now under SRAM) | Created the first production MTB suspension fork (RS-1), now offers wide-range forks from XC to DH. |
| SRAM | 1987 | USA (owns RockShox) | Parent brand of RockShox, focuses on full component integration (AXS, Flight Attendant systems). |
| MRP (Mountain Racing Products) | 1996 | USA (Colorado) | Small-batch, high-performance forks like Ribbon, with unique Ramp Control and modular tuning. |